New Project- Re-building a Dana 30

PoliceMonkey161

New member
Hello Gang....Ok so my last project was rebuilding an AMC 20rear end that I end up trussing out and stitch welded the tubes. Worked outgreat!(see the before and after below). I have put about 1000 miles on it, noproblems so far.
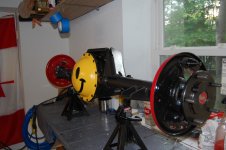
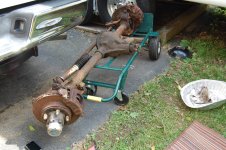
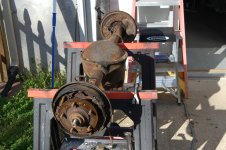
Now I'm moving on to the front end, I traded my old AMC 20rear for a slightly used Dana 30 (see photo). So far, I have it all torn downand started to clean off the 27 plus years of rust. If you have the time, Ihighly recommend re-building your our axles. It is time consuming, but oh sorewarding.......
various 014.JPG
and after.......... various 069.JPG
So here is the Dana......EBAY JUN 055.JPG
 

are u going to do a build thread?? i've been thinking about re-doing mine, but have no experience so am looking for some guidance...
 
I was thinking about it? But I have more photo's of the AMC 20 I did. I have some great links to help you out, I just need a day or two to find them. It's not hard, just time consuming. Personally, I found it to be so much more rewarding to learn it and do it myself.....And save a lot of money.
 
So, I found thelink's that helped me re-build my differentials........... Don't hate, one isfrom another jeep forum . It deals with the AMC 20 and isexcellent! The other is a general guide for Dana differentials. Between the twoarticles, almost every question you could ever have is answered. You will needto buy or rent (?) some tools, but most are affordable and will be useful down theroad. I hated shelling the money for a press, but it has paid for itself! You'dbe amazed at the things you can use a hydraulic press for!

http://www.pirate4x4.com/articles/tech/billavista/Gear_Setup
http://www.jeepforum.com/forum/f8/amc-20-gear-build-thread-579159/
 

Hello All... I've had several members ask about my Dana 30rebuild, unfortunately I did not take many photo's of the strip down and gearset up, but I started taking photo's today during the re-assembly. So, let's go with that you are re-building your stock differential and are going to re-use your existing gear set up, but want to replace the bearings, races and seals.
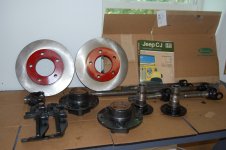
First, here are my newly painted parts with POR-15 minus the knuckles which need extra top coat since POR-15 is UV sensitive and I missed a few spots.
front end 001.JPG


Today we will cover assembling the rotor to hub. First Iwill press the new races into the hub. Hold on to your old parts, they will come in handy. I've cleaned the inside of the hub from overspray with a"scotch pad" and put a light coat of lithium grease on the inside ofthe hub and new race. We will start with the inside of the hub.

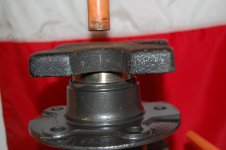
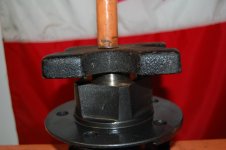
First, use a press arbor plate on the top and bottom to start the race. Next, I'll use the old bearing race on top of the new one to press intoplace. Be careful of binding, stop if parts are not square.
front end 002.JPG


front end 004.JPG

Next we will pressthe external side of the hub, same as inside with pre-cleaning and grease.However, you will need two of your old races stacked on top of each other to get it fully seated.
front end 005.JPG


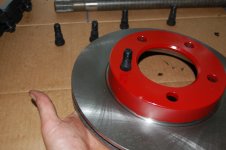
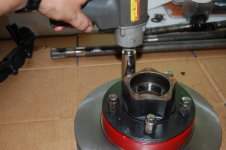
Now I cleaned up the extra grease and looked for binding or miss-alignment. In order to press the hub on to the rotor, I used new studs(but that is up to you). I started with two studs on opposite sides (I greasedthe threads only) through the rotor into the bearing. Turn the suds slightly until you feel them align with the stud groves in the hub housing. Next I applied lug nuts and tightened them slowly with a impact wrench. front end 006.JPG


front end 007.JPG


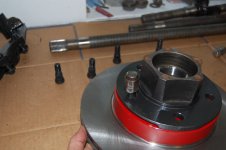
After getting the first two started, I continued to install the other three. I used a cross pattern (like installing a rim to a axle) to compress the studs. Go slow and check for miss-alignment or binding.

front end 008.JPG


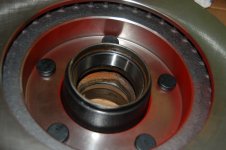
After you have fully tightened the lugs, flip over the rotor to make certain your studs are seated.
front end 009.JPG


So now, you have an assembled rotor and hub!
 
Last edited:
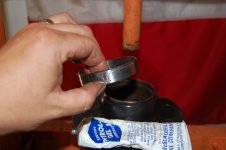
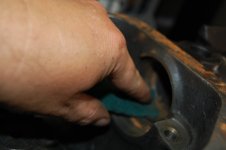
So today , I installed the inner oil seal. I started by cleaning out the socket of reside and rust using a scotch pad with a little alcohol on it.
DSC_0057.JPG


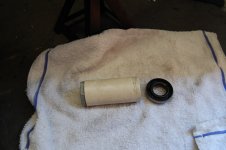
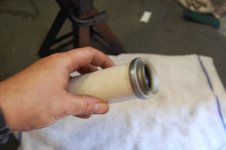
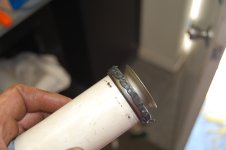
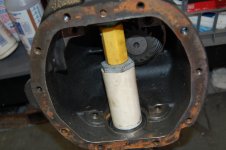
I'm sure there as many ways and tools to do this as days in a month. However, I made a pressing tool out of a small piece of SCH 40 PVC pipe that was squarely cut and angle tapered (beveled?) the end that would be in contact with the seal face. It's a perfect fit! I pressed a steel bushing into the opposite end of the pipe.
DSC_0058.JPG

DSC_0059.JPG

As you can see, I put a bead of RTV around the outer seal.Some manuals make reference to this and some don't. The CJ Manual by Moses Ludel recommends this and he has not lead me wrong yet! I got the started by hand,then inserted my home tool on top of it. I choose to start with the short side seal first since I knew it would be the harder of the two sides. I used an old steel broom handle as the extension the hammer the seal in place. Would have been easier with a helper!
DSC_0060.JPG

DSC_0062.JPG
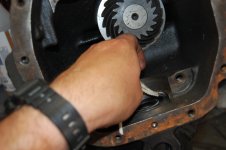
After that is done, clean up any access sealant and check for a square fit. I used a big pipe cleaner (actually, it is a gas tube cleanerfor a M16/M4 rifle), worked out great!
DSC_0061.JPG


Next you'll just flip over your axle and repeat. keep in mind that you will need to be careful on this side because you will be guiding your rammer pipe through the seal you just installed! The last step I did was to use my air chuck to blow out any remaining debris.
 
Last edited:
Back
Top